The Beekeeper’s First Three Months

The Beekeeper’s First Three Months
Prepare the Hives
• Assemble the boxes with glue and nails.
• Paint the boxes on the outside surfaces. Don’t paint the inside surfaces or top and bottom
edges. Applying a high-quality primer and exterior latex paint will extend the life of the hive equipment.
• Assemble the frames with glue and nails. Don’t forget the important nail that goes into the side bar to secure the top bar!
• Insert foundation into the frames.
Prepare the Apiary
• Select a location with consideration for the safety to people, pets, and livestock.
• Select a location for ease of access. For example, choose a location where you can drive to the bee hives in a pickup truck, four-wheeler, or where you can walk up with a wheeled
cart. Hive equipment and honey are heavy! Don’t put hives where you have to cross a ditch or other obstacle to access them.
• Choose a site in full sun if possible. Some trees to the west of the bee hives provide some afternoon shade which is helpful for the bees in cooling the hives in the summer—and comfortable for the beekeeper! Evergreen trees to the north of the bee hives provide a nice wind break in the winter.
• It is important that the bees have a reliable water source. A creek or lake within one quarter mile of the hives is a good source. Otherwise, place tubs of water in the full sun for the bees to access. Place rocks or other objects in the tubs for the bees to climb upon. A water source near the hives is especially important if neighbors have a swimming pool. Bees love to forage for water from either chlorinated or salt-water swimming pools.
• Build sturdy hive stands for your hives. Hive stands can be built by placing four-inch by four-inch timbers on concrete blocks or by placing hives directly on concrete blocks. A hive will fit atop tow concrete blocks, but it is close to the edges and subject to falling off; use four blocks for a broader foundation. Don’t place bee hives on wooden pallets. Pallets will rot and collapse with the weight of bee hives.
• Place hive stands where you have easy access to the back side of the hives.
2
• Place the hives so that the entrances face toward the east or south if possible. Morning sun striking the face of the hives encourages the bees to fly earlier in the day, lengthening their daily forage time.
Installing Honey Bee Nucleus Colonies
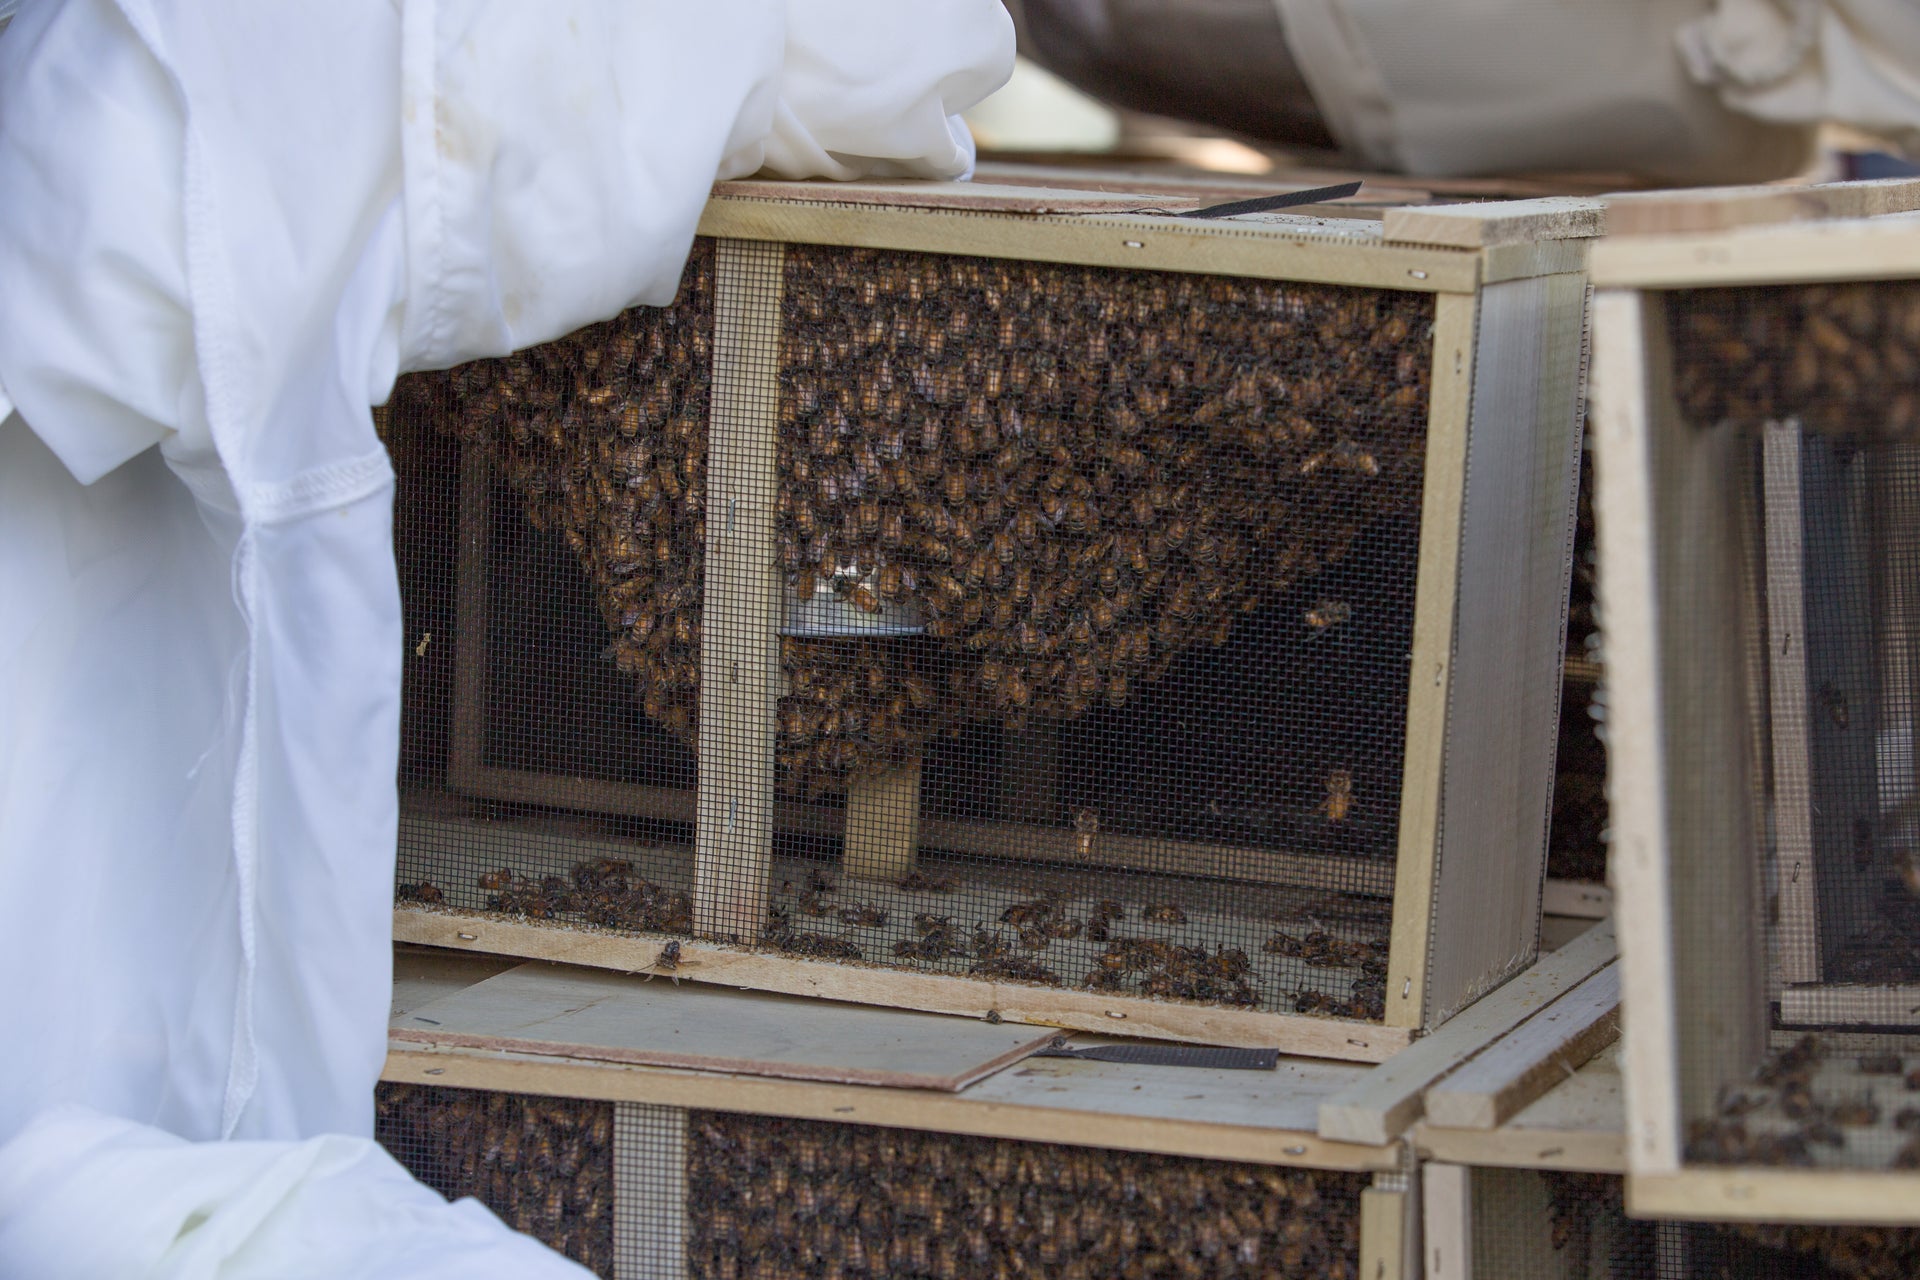
• A nucleus colony (nuc) is typically five frames of bees on drawn comb used as a starter colony for a full-size hive. A nuc is a colony in equilibrium. It is a small colony containing an egg-laying queen, brood, and worker bees of all ages. Unlike packaged bees, the queen is not held in a separate cage. She is walking about on the frames. The nuc may contain frames of honey and pollen.
• When you get your nucs at the pick-up location, keep nucs housed in corrugated plastic boxes shaded from the sun. Allow ventilation around the boxes. If the nucs are carried in the back of a pickup truck, protect the bees from strong wind.
• At the bee yard, the nucs may be installed in full-size hives upon arrival; or, if protected from the sun, the nucs may be placed on their stand locations with the nuc entrances open. If necessary, nucs can be held in storage for a day or two in a cool, dark area, such as a closet, before installing in hives.
Preparing the Hive for a Nucleus Colony
• Place the bottom board on a hive stand. Place one hive body on the bottom board.
• Spray sugar water on interior surfaces of the hive and frames of foundation.
• Have a feeder and sugar syrup (one part sugar to one part water) ready to place on the hive.
• Reduce the hive entrance to about three inches to prevent robbing while feeding the bees. Block the entrance with grass.
Installing the Nucleus Colony
• Since honey bees don’t fly at night, if you wait until late afternoon to install the nuc, the bees will be inclined to stay inside the hive.
• Remove the frames from the nuc box and place them in the center of the hive.
• Place frames with foundation on the sides of the nucleus colony to fill the box.
• Place a feeder on the hive and fill it with sugar syrup.
• Cover the hive with both inner and outer covers.
• Don’t worry about getting all of the bees inside the hive. Stragglers will gather underneath the hive or find other hives. After the Nucleus Colony is Installed in the Hive
• Check the hive in a week for egg laying. Make sure that the hive entrance is open.
• Feed the hive until comb is drawn out on seven frames, and then place a second hive body with frames of foundation on top. Continue feeding until these frames are drawn out.
Installing Packaged Bees
When you Receive a Package of Bees
• Your bees may be delivered by mail to your local post office; they may be delivered to your door; or you may drive to a pick-up location for your bees.
• Keep packages of bees shaded from the sun. Allow ventilation around the boxes. If the bees are carried in the back of a pickup truck, protect the bees from strong wind.
• Once the bees are at your home, mist the screened sides of the packages with sugar water.
• If necessary, packages of bees can be held in storage for a day or two before installing in hives. Store the packages in a cool, dark area, such as a closet.
Preparing the Hive for a Package of Bees
• Place the bottom board on a hive stand. If using a screened bottom board, put the insert in place to darken the hive. Place one hive body on the bottom board.
• Spray sugar water on interior surfaces of the hive and frames.
• Have a feeder and sugar syrup ready to place on the hive.
• Put an entrance reducer in place and block the entrance with a sturdy plug of grass. Installing a Package of Bees in the Hive
• Wait until late afternoon to install the bees. Since bees don’t fly at night, they will be inclined to stay inside the hive.
• Remove about five frames from the hive and place them to the side.
• Pry the cover off the package of bees.
• Remove the tin can holding syrup used to feed the bees while confined in transit.
Immediately cover the large hole in the top of the package with a cloth to prevent the bees from flying away.
• Remove the queen cage from the top of the package. Check that the queen is alive. She may be surrounded by a few attendant worker bees.
• Remove the cover from the side of the cage with the candy plug.
• Gently puncture the candy with a thin nail. Don’t push the nail completely through the candy. You are just checking the hardness of the sugar candy and preparing it for the bees to eat.
• Place the queen cage between the top bars of two frames. Place the queen cage at an angle with the candy plug side facing upward. It is important that the screen on the side of the queen cage is not obstructed so that workers can pass food to the queen. It is also important that the candy plug is exposed so that the bees can chew out the candy and release the queen.
• Vigorously shake the bees from the package into the empty space in the hive where you removed the frames.
• Gently place the frames in the hive. The bees will move away, and the frames will settle down into the hive.
• If all 10 frames do not fit into the hive with the queen cage wedged in place, leave one frame out until you remove the queen cage in a few days.
• Check the position of the queen cage again for access to the screen and candy plug.
• Place a feeder on the hive and fill it with sugar syrup.
• Cover the hive with both inner and outer covers.
• Place the empty package on the ground in front of the hive. Don’t worry about getting all of the bees inside the hive. Stragglers will gather underneath the hive or find other hives.
After the Bees are Installed in the Hive
• Wait four or five days to check for queen release.
• If the queen has escaped, remove the cage. If she is still in the cage, puncture the candy plug and leave the queen cage in place for another day.
• Return to the hive and check again for queen release. If she is still in the cage, observe the workers. If they are not showing aggression toward the queen (biting at her), release her by hand into the hive.
• Return the final frame to the hive.
• Check the hive in a week for egg laying.
• Remove the insert from the screened bottom board.
• Feed the hive until comb is drawn out on seven frames, and then place second hive body with frames on top. Continue feeding until these frames are drawn out. Reduce the hive entrance to prevent robbing while feeding the bees.
Installing a Swarm
• If installing a swarm, wait until later in the afternoon or evening.
• Place a hive body with frames on the bottom board with an entrance reducer in place.
• Block the entrance with grass to hold the bees confined temporarily inside the hive.
• Remove a few frames from the center of the hive and shake the bees into the hive.
• Immediately replace the frames and close the hive with a feeder and sugar syrup in place.
• Feed the bees for as long as they are taking up the syrup and drawing out comb on the foundation. Your goal for the bees’ first summer is to draw out combs on the foundation. If the bees build comb that is not attached to the foundation, remove it.
• Allow the bees to build up comb on foundation and expand the bee colony one box at a time. Add a second box when the first box is 70 percent filled. When the second box is 70 percent filled, add a honey super. The use of a queen excluder is optional, but its use has benefits.
Apply Honey Supers
• Inspect the bee hives periodically throughout the spring and summer. Add honey supers as needed to take advantage of nectar flows. Timely supering is necessary for maximizing honey production. Enjoy your beekeeping!
Richard Underhill, M.Ed., EAS Certified Master Beekeeper, PeaceBeeFarm.blogspot.com